
Introducing Evervault Page Protection: Securing payment pages from JavaScript attacks
Secure your payment pages against script and security header attacks while complying with PCI DSS 4.0 requirements, 6.4.3, and 11.6.1.
By Shane Curran
Shane Curran

Engineer
Earlier in the series, we discussed how to build and deploy a Cage to a Nitro Enclave. In this blog post, we’re going to discuss how the Cage environment is initialized on startup. Using enclaves should be simple, so we developed a system to provide TLS certificate provisioning and secrets management out of the box. To ensure that Cages would be completely language agnostic, we also added an on-enclave API to manage encryption, decryption and attestation document retrieval.
One of the greatest benefits of using a Trusted Execution Environment (TEE) is being able to cryptographically prove that the code running in it was written and signed by you. The attestation document issued by the Nitro Security Module (NSM) is a signed declaration of what is running inside the enclave and also includes a measure of the public key used to sign the enclave image file. We decided to expose this in the TLS handshake to allow clients to assert the legitimacy of the Cage before sending sensitive traffic to it. To make implementation easier, we've baked this functionality into our Node and Python SDKs.
When designing Cages, we needed two things to be true for TLS implementation:
We knew we would need to inject a cert for the Cage’s domain on startup to allow TLS termination to happen in the data plane. However, because the attestation document embedded in the SAN extension will expire after three hours, the Cage would need to request a new cert regularly to keep the attestation document valid. Instead of sending a new certificate regularly, we provision an Certificate Authority (CA) on startup to allow the Cage to regenerate certs when necessary.
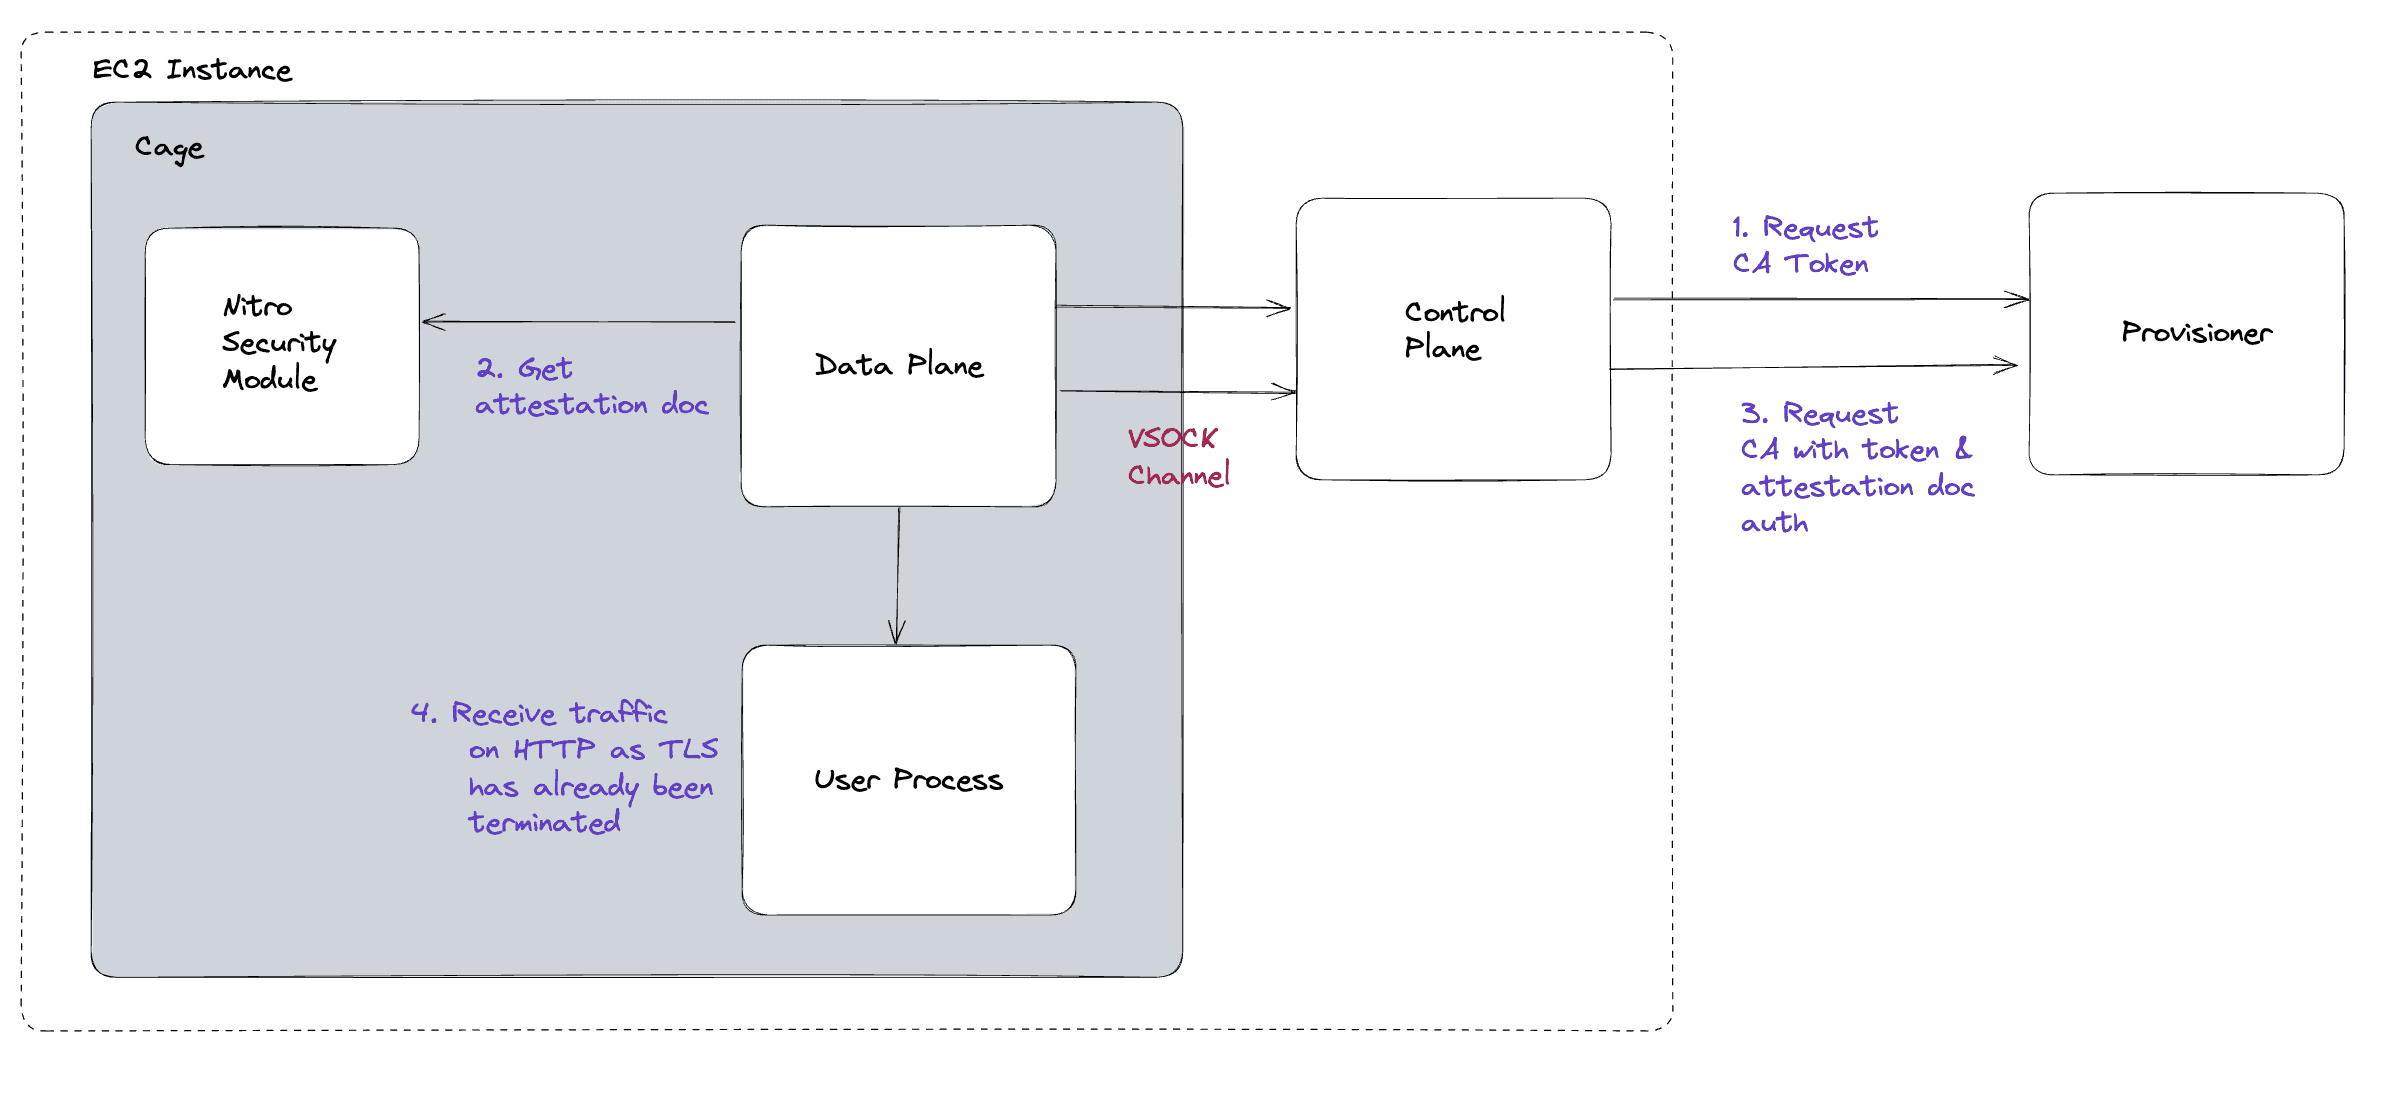
On startup, the data plane requests a JWT from the Cage provisioner via the control plane. The token request must originate from the control plane because it’s fully controlled by Evervault and can be trusted to give the correct Cage and app UUIDs. The control plane authenticates with the provisioner using mTLS.
The provisioner will sign a short-lived JWT token containing the Cage details and the Cage IP. The token is then sent back to the data plane so it can request a CA.
The data plane requests an attestation doc from the NSM (Nitro Security Module) using the token as a challenge and will then send it to the Provisioner to request a CA.
The following validations are performed by the provisioner when a CA is requested:
This handshake gives us the following guarantees:
Once all of the validations pass, the provisioner will generate an intermediate CA for the Cage. The issued CA includes a name constraint so that the Cage can only issue a cert for {cage_name}.{app_uuid}.cages.evervault.com. The Cage can then regenerate certs to serve as needed. The data plane will serve fresh certs without any intervention from the user process, and TLS will be terminated in the data plane. This allows the user to start up a simple HTTP server and know that TLS encryption is already handled.
We also made this feature optional in case users prefer to manage their own certificates. It is feature flagged using Rust conditional compilation and will not be included in the data plane if the feature is disabled.
If you’ve developed any application that runs in multiple environments, you’ll know that you need to externalize these values so that you can run the same binary with different environment variables depending on where it’s running. Ideally, you don’t want to send out test notifications in your production environment
When we built out the system, we knew we needed the following:
Environment variables can be added via the CLI or the Evervault Dashboard and the choice is given to store as a secret or plaintext value. You may leave non-sensitive environment variables in plaintext so they can be viewed directly in the dashboard. Sensitive vars, like an API key, should be stored as secrets.
The secret will be encrypted in your browser (you can verify by checking your network tab) or on your machine if you’re using the CLI. This means that the secret will never be in plaintext on Evervault’s infrastructure except within an enclave when ready for use.
On startup, the environment will be included in the response with the CA. If the TLS termination feature isn’t enabled, the environment will still be queried on start-up.

When the data plane retrieves the list of environment variables, it filters out the encrypted secrets and sends them to the Evervault Encryption Engine (E3) to be decrypted. They are written to a file that is accessible by the user process. The Runit script to start the user process will read that file continuously, waiting to see that it has been initialized. When the file has been populated, Runit will export the environment variables and then start the user process, which will have full access to them.
If it's preferred for environment and secrets to be included in attestation, they can be added as ENV directives in the Dockerfile used to build the Cage. Any sensitive values can be encrypted and decrypted by the user process on startup via the Crypto API.
When we started to build Cages, we knew we wanted to allow users to run applications written in any language on an enclave. We have ever-growing SDK language support, but there will always be an interest in a new language we haven’t developed yet. The Nitro Enclaves NSM API is written in Rust, so unless your app is developed in the same language, you’ll need to use FFI to access the Nitro Security Module.
In order to make Cages language agnostic, we created an on-enclave API to abstract away the functionality typically covered by an SDK.
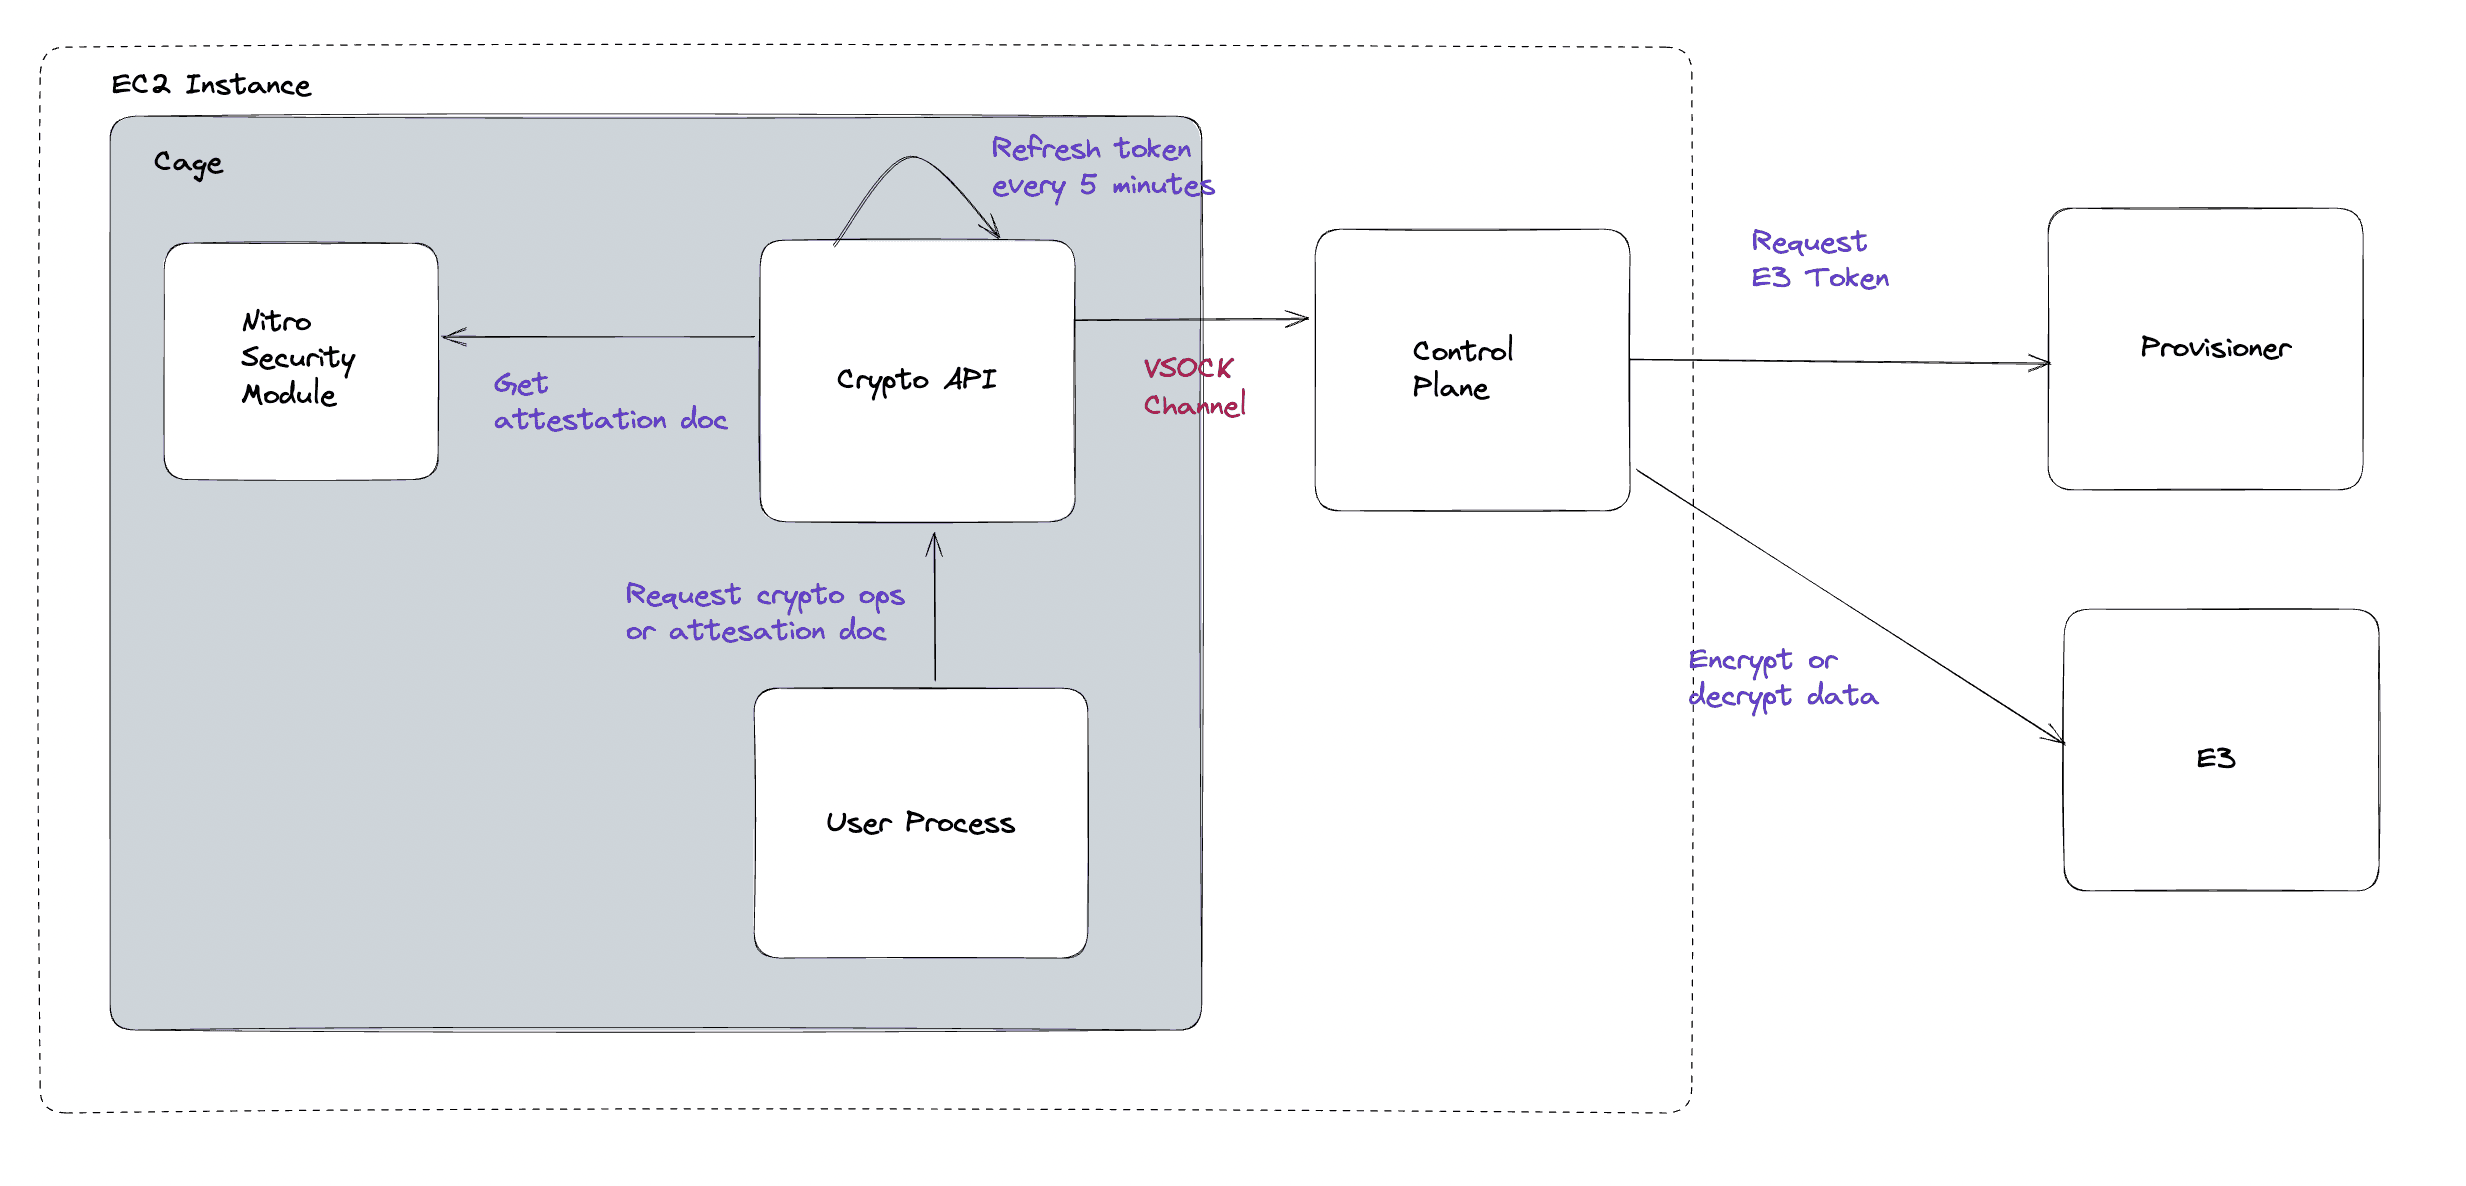
The Crypto API is available on every Cage to handle encryption, decryption, and expose attestation documents. It exposes three endpoints:
/encrypt/decrypt/attestation-docThe Crypto API runs on loopback, and the user process can access it on 127.0.0.1:9999. It proxies traffic over to the control plane, which will route the request to E3 for encryption or decryption.
As mentioned earlier, the attestation document is an important element of the trust model of Nitro Enclaves but retrieving it on the enclave isn't simple depending on what language your application is written in. To remove this burden for users, the application can call the Crypto API with a nonce and challenge and the attesation document will be requested and returned to the application by the open source Evervault Cage runtime.
The Crypto API requests tokens from the provisioner to access E3 in a similar flow to CA tokens. When the data plane retrieves an E3 auth token, it requests an attestation document using the token id as a nonce and caches it for the token's lifetime.
The user process can then make an unauthenticated request to the Crypto API which will send the token and attestation doc with each request to E3. This allows the user to focus on writing their application and we will manage authentication and token refresh invisibly behind the scenes.
Our goal with Cages was to make Dockerfiles easy to deploy to secure enclaves while offering features like TLS cert provisioning and secrets management by default. By creating built-in attestation with the flexibility for a developer to include or exclude environments, we hope it offers a solution for developers and teams with varying needs. Cages also facilitate users to develop applications that can encrypt and decrypt data on an enclave in any language. Try it out today and get 14 days free when you sign up for Cages now.
Secure your payment pages against script and security header attacks while complying with PCI DSS 4.0 requirements, 6.4.3, and 11.6.1.
Shane Curran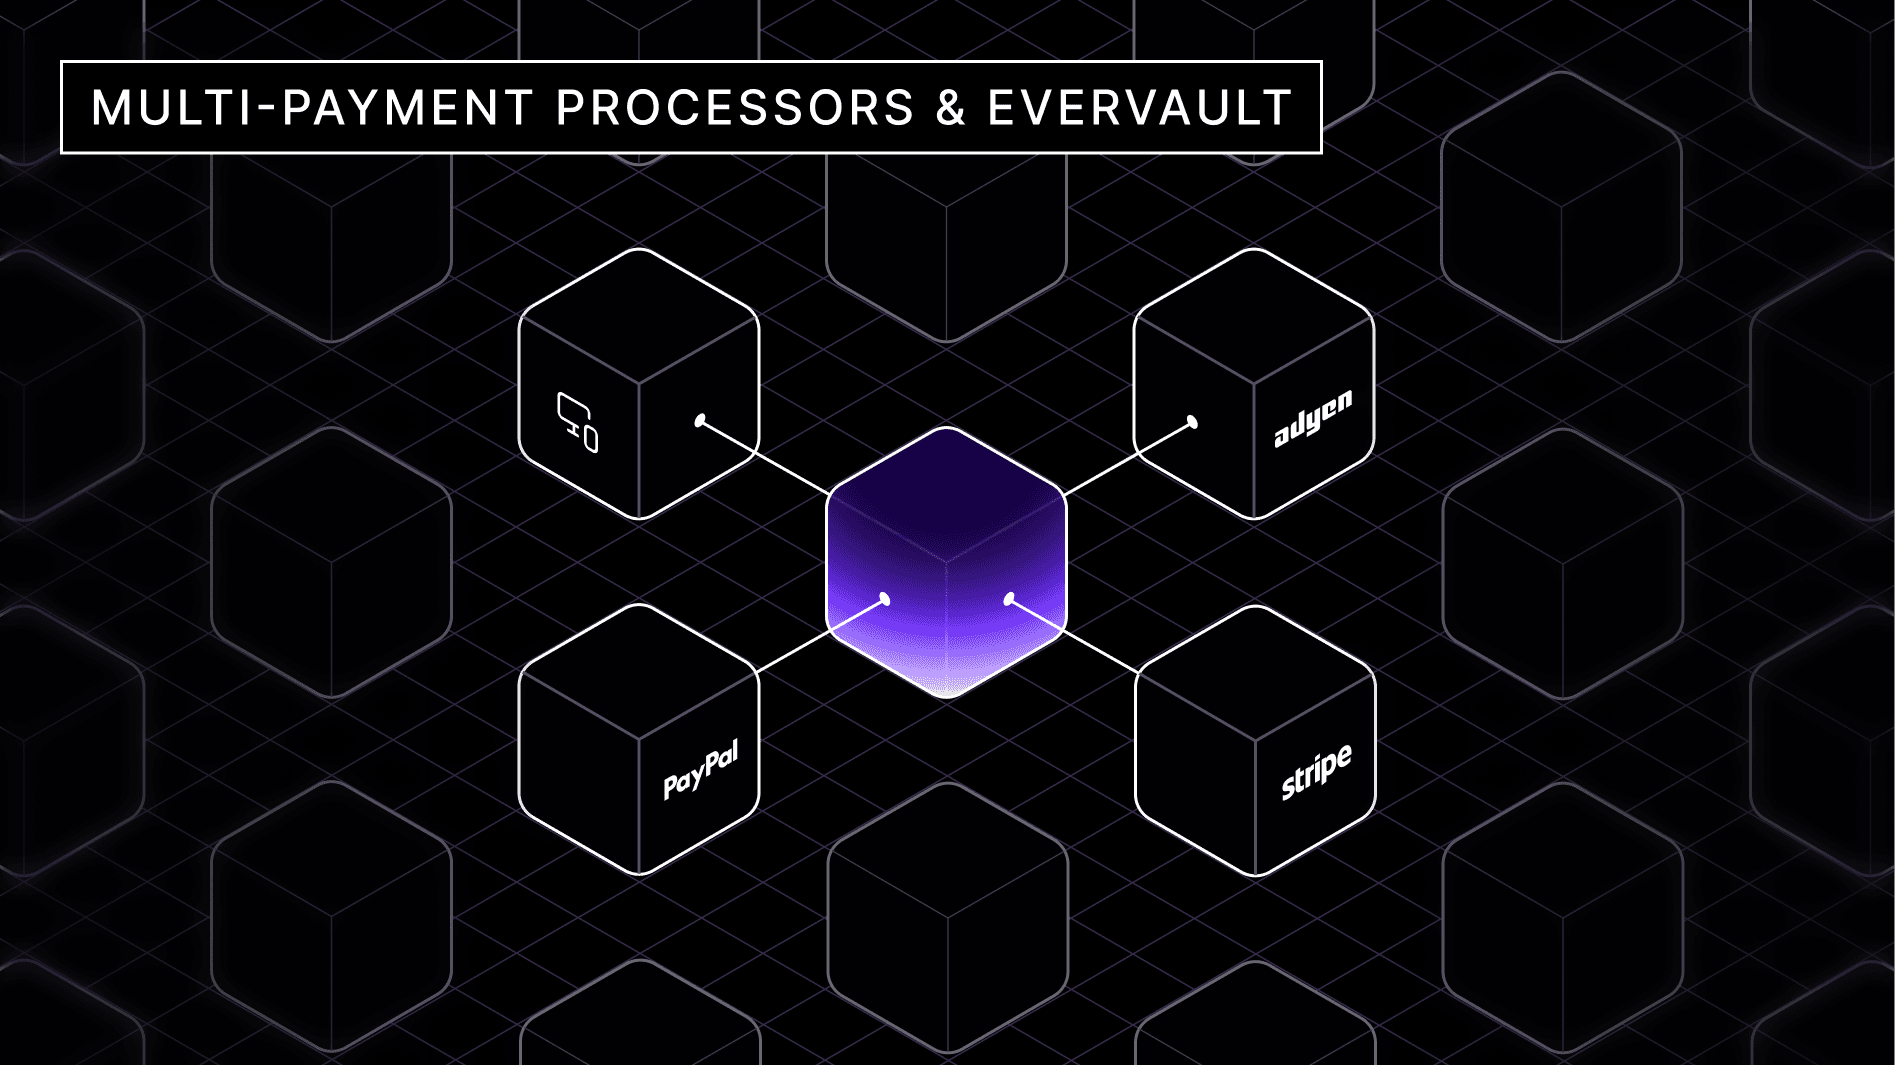
Multi-payment processor systems integrate multiple payment providers to handle transactions. Use Multi-psp to boost coverage to local populations and minimizes net transaction fees.
 Mathew Pregasen